
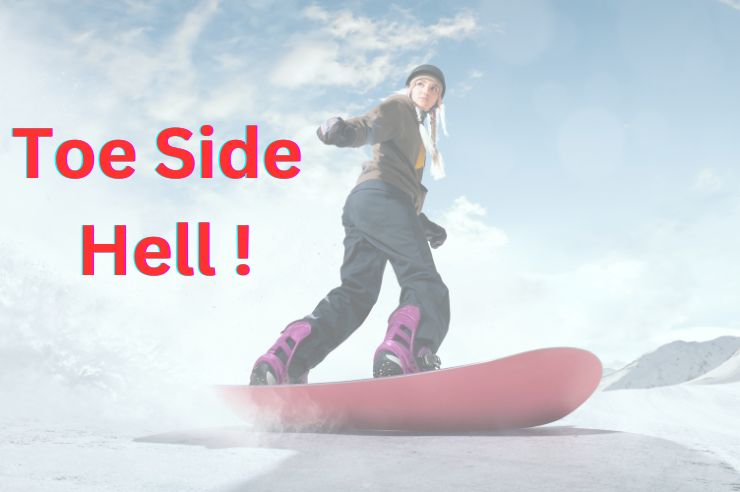
Toe side turns can be incredibly frustrating when you’re learning to snowboard. Unlike heelside, which allows you to see where you’re going, toeside forces you to look backwards over your shoulder. This makes it difficult to properly align your body for the turn.
It’s also harder to generate pressure on the toe edge of your snowboard to initiate the turn.
Toe turns require an unfamiliar body position. Often new riders will bend at their waist instead of keeping their spine straight, making it nearly impossible to control the board.
Simply putting weight on your front toe also feels unnatural after getting comfortable with heelside.
Maintaining balance is a major issue too, as even slight shifts can cause you to catch an edge and fall.
In the sections that follow, I explore specific techniques for improving your toe side turns, from small steps you can take to gain confidence, to drills for fully mastering this essential snowboarding skill.
See also: Can you teach yourself snowboarding?
Proper stance
Getting your stance right is key to gaining confidence in your toe side turns. You’ll want a slight forward lean with your shoulders aligned just ahead of your hips. This will help direct pressure to the front of your snowboard.
Keep your knees bent and weight balanced evenly between both feet. Leaning too far back shifts your center of gravity away from the toe edge, making it harder to engage.
Don’t forget to look where you want to go. Focusing your gaze over your right shoulder will help you complete the turn.
See also: Is my snowboard stance too wide?
Weight distribution
Another important factor in a toe side turn is to balance your weight correctly. At the start, shift 60% of your weight to the front foot to drive the toe edge into the snow.
Lean into the turn from your ankles, keeping your core engaged. As you traverse across the hill, allow your hips to rotate, transferring weight progressively to the back foot.
By the end of the turn, you’ll be balanced at 50/50 between feet once more.
Don’t be afraid to really feel the shift in your weight from one foot to the other. On those challenging steep runs, focusing intently on weight distribution will help you hold an edge that might otherwise slip out.
The movement should feel dynamic, and your turning energized all the way through each arc.
Edge control
You toe edge is pivotal for conquering the toeside turns. As you initiate the arc, focus on aggressively engaging the toe edge to bite into the slope.
Kick the tail of your board out slightly to really dig in. Use the edge like a blade to slice through the snow.
Maintaining solid contact throughout the turn is important too. Don’t let the edge wander or slip out from under you. As you traverse across the hill, keep squeezing your boots to hold the edge without sliding backwards.
You’ll soon develop a sixth sense for exactly how much pressure to apply. Edge control is what links it all together and is the key to carving confidently down the mountain.
See also: Are Stiffer Snowboards Harder To Ride?
Body positioning
Toe turns require you to get aligned over your board. Start with shoulders parallel to the hill, hips slightly open for balance. Bend knees to lower your center of gravity for quick edge-to-edge transitions.
Keep your spine straight, not hunched – look where you want to go to guide smooth carving. As you progress through the turn, feel your body naturally rotating to follow the arc.
Allow your hips and shoulders to lead the way, with your feet following the shape of the turn.
Stay over the board, not leaning too far in any direction, and keep your arms relaxed yet engaged for stability. Listen to your body’s cues to refine your alignment.
See also: Backseat riding – how to fix
Managing your fear
It’s natural to feel apprehensive when first attempting toeside turns – facing backwards feels counterintuitive. But conquering that fear is key.
Focus on your form rather than potential outcomes. Breathe deep and relax your body, visualizing the turn rather than what’s behind you.
Start slow with baby steps – try to get comfortable riding switch before attempting full turns.
Build confidence by practicing one turn at a time in open areas, without pressure to chain multiple connected runs. Don’t be too hard on yourself if you make mistakes. With a positive mindset, you’ll overcome the fear soon.
See also: How to overcome your fear of snowboarding
Ankle flexion
Being able to flex your ankles is important role in balanced toe side turns. With heelside, your ankles naturally point downward allowing the edge to engage.
Toeside requires dorsiflexion – bending your ankles to lift the front of your board. This loads the toe edge for quick initiation.
If your ankles lack mobility, the board may slip backward instead of carving the turn. Off the slope, improve dorsiflexion with stretches like child’s pose.
On the mountain, be conscious of flexing your ankles inward throughout each turn. Focus on lifting the nose to maintain control. With mobilized ankles, your board will eagerly respond to your commands, which will enable smooth linked turns down the slope.
As your ankle flexibility improves with practice, your toe side carving will become more natural and powerful. You’ll be able to lay down long, consistent arcs with ease.
See also: Can you snowboard with a sprained ankle?
Speed control
It’s better to start slow and work on form rather than risk losing control at higher velocities. As you begin to practice, choose gentle, groomed slopes to focus on technique.
As you begin the turn across the fall line, ease up slightly on the pressure to bleed off speed. Then progressively re-engage your edge to steadily increase pressure through the remainder of the arc.
Having sensitivity to adjust brake pressure allows precision carving at a comfortable pace. Don’t be afraid to walk back up and repeat practice runs until speed control feels natural.
With consistent practice of gradual acceleration and braking, you’ll soon smoothly link turns with confidence at higher speeds.
Equipment check
Before attempting toeside turns, check that your bindings are adjusted symmetrically and centered relative to your feet. Your angles should be narrowed in neutral position for balance while riding switch.
Check your base for damage, and ensure a fresh wax or tune. Check the edges of your board – dull or damaged edges won’t carve a smooth turn.
Try to wear comfortable boots that fit snug but don’t restrict ankle movement.
Drills for toe side turns
When first learning toeside, it can help to break the turn down into smaller drills. Drills isolate key aspects for mastery of the full turn.
One such drill is kickturns – simply rotate the board 90 degrees while keeping it flat based. This builds confidence in the switch stance.
Another effective drill is skidding – slide across the fall line while applying even pressure along the toe edge. Focus on form rather than not speed. You can also practice dynamic sliding by gradually increasing pressure to “carve” the skid.
Traversing is also great – i.e. ride across the hill without turning. Feel the edge grip and weight distribution. As you progress, add a subtle kick of the tail to start the turn.
Final words
Don’t get discouraged if toeside turns feel awkward at first. Give your muscle memory time to develop through incremental practice. Focus on your form and edge control more than speed or stringing long runs together.
Film your turns and review your technique objectively. Consider taking a lesson to get expert feedback. Strengthen related skills like balance and ankle flexibility off the slopes as well.
Remember to have fun! Your stoke and enjoyment of progressing will motivate you to spend extra time working on your toeside form.